


When you need an app screenshot for a release note, a portfolio, or a tutorial cover, the usual next step is to drop it into a phone or laptop frame. Hunting down a PSD mockup, lining up the perspective, and exporting a single image is a lot of work for one picture. Uploading an unpublished interface to an online mockup site raises a different worry: does that screenshot leave your computer?
Puff.ee is a browser page for device mockups. You drop in a PNG, JPG, WebP, or a short video, pick a device and a layout, and export a still image or a very short motion clip. The site says rendering happens locally and that images are not uploaded to a server. You can open it and use it without an account. What follows is a walk-through from November 12, 2026, when we opened the page and finished one PNG export: how to use it, what the file looked like, and which network checks we did not run.
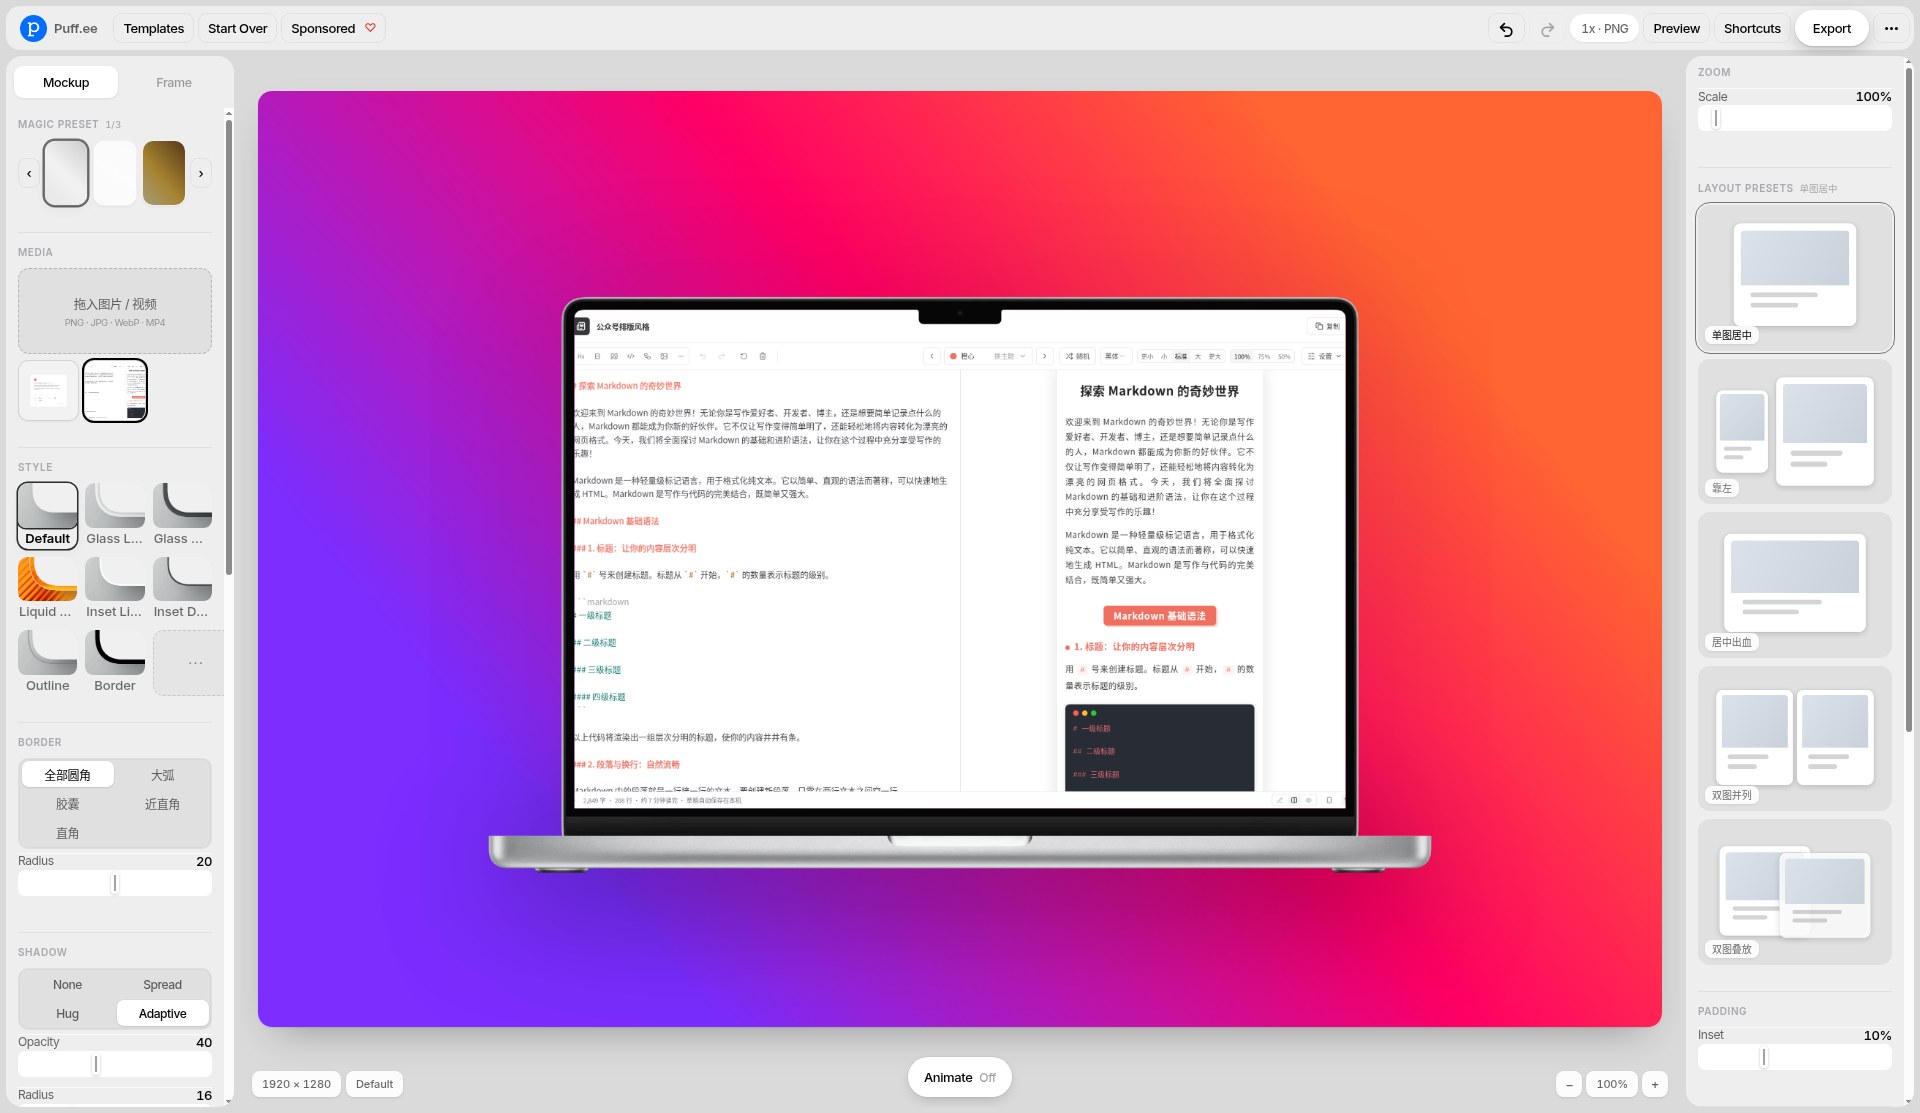
Who it is for, and what to check first
It is a good fit if you already have a UI screenshot and only want it inside a common device frame, quickly: an indie developer writing release notes, a designer handing over a one-page preview, or a tutorial that needs a picture of “this is how it looks on a phone or a laptop.” It does not replace Figma, Sketch, or Photoshop, and it will not produce a commercial scene of any brand at any angle. The current focus is Apple device mockups. The page intro lists 31 iPhone, iPad, Mac, and Apple Watch models, plus five layouts. Once you open the device list you can also see Android and Browser categories; which specific models are actually there is a matter of what the page shows that day, so do not assume from the intro numbers that “every Android phone is included.”
| Item | Details (reviewed and partly tested on November 12, 2026) |
|---|---|
| Address | puff.ee |
| Input | The page says you can drop in PNG, JPG, WebP, or MP4, or paste an image onto the canvas as prompted. In this test, clicking the Media area on the left did not open a system file picker; Ctrl+V paste worked |
| Devices and layouts | The default device this time was a MacBook Pro 16" (canvas 1920 × 1280). The model list included iPhone 17 / 16 / 15 and others, plus Android and Browser categories. Layout presets on the right included a single centered image, a left-aligned composition, a centered bleed, and two devices side by side |
| Export | The export panel offers PNG, JPEG, and WebP, at FHD 1x, 4K 2x, 6K 3x, and 8K 4x. There is also “Record WebM (3 seconds).” This test exported successfully as PNG at FHD 1x |
| Where it runs | The site says everything is rendered in the browser and files are not uploaded. We did not open the Network panel during import or export to check |
| Price | You can use it without signing in. The Sponsored link in the top bar goes to a tip page that says the tool is completely free and tips are voluntary; you can still export without tipping |
| Watermark | The export dialog had no required watermark option. The PNG we exported also had no Puff.ee logo or text watermark |
The first time we opened it, the canvas was empty, with a prompt in the middle: “Drop a screenshot to start / or click Media on the left · ⌘V to paste.” You will not always see a demo mockup waiting for you.
How to put a screenshot in a device and export it
- Open puff.ee. You do not need an account first. If the canvas already has demo content, use Start Over in the top bar so you do not stack your image on top of the sample.
- Drag an app screenshot into the Media area on the left, or paste it onto the canvas as the page suggests. The image should appear in the device screen. If you only see the bezel and an empty screen, confirm the file is a PNG, JPG, or WebP, and that you are not still looking at the empty-canvas prompt. In this test, clicking Media did not open a file picker; pasting worked.
- Pick the model you want, for example a particular iPhone or another Mac. Then look at the screen aspect ratio. A tall screenshot in a landscape laptop, or a wide desktop capture forced into a phone, will be cropped or letterboxed. That is expected. Crop to the target device’s ratio in your screenshot tool first, then drop it in.
- If you need two images side by side, or a full-bleed image, switch the layout preset on the right and nudge alignment with padding and position. Background color, shadow, and corner radius can all be changed, but first make sure the screen content is complete and that the bezel is not covering a button you care about.
- Click Export in the top right. Start with the default PNG at FHD 1x and check that the export is sharp and the frame is intact. For a poster or print, raise the multiplier (2x / 3x / 4x) and expect a much larger file. On a modest computer, an 8K export can be slow or memory-heavy — that is the cost of rendering locally.
- Open the downloaded file in a local image viewer. Confirm it really is your screenshot, that it was not stretched by accident, and that you have not left a watermark or leftover sample art in the frame. Do not rely only on the in-page preview.
If you want a three-second looping device shot, use Record WebM. A short clip can work on a website or in a portfolio; it will not necessarily play well on every social platform. Try it on the destination first. We did not record a WebM this time.
What we actually exported: an iPhone mockup
The test was on November 12, 2026. The source was a widescreen webpage screenshot from typography.gantz.host, about 1440×900 — not a UI cropped to a phone ratio. After we pasted it, the default mockup was a MacBook Pro 16", the details panel showed screen pixels of 3456×2234, and the screenshot was fully visible in the laptop screen.
We then chose iPhone 17 Pro (the panel showed 402×874 screen pixels, with a release year of 2026). The same widescreen shot was mapped onto a narrow screen, and a large strip was cropped from the middle and the sides. It looked like “the phone frame is right, but the interface inside does not match.” That was not an export failure; it was a mismatch between the screenshot’s aspect ratio and the device screen. If you actually need a phone marketing image, crop to that phone’s screen ratio first, then paste.
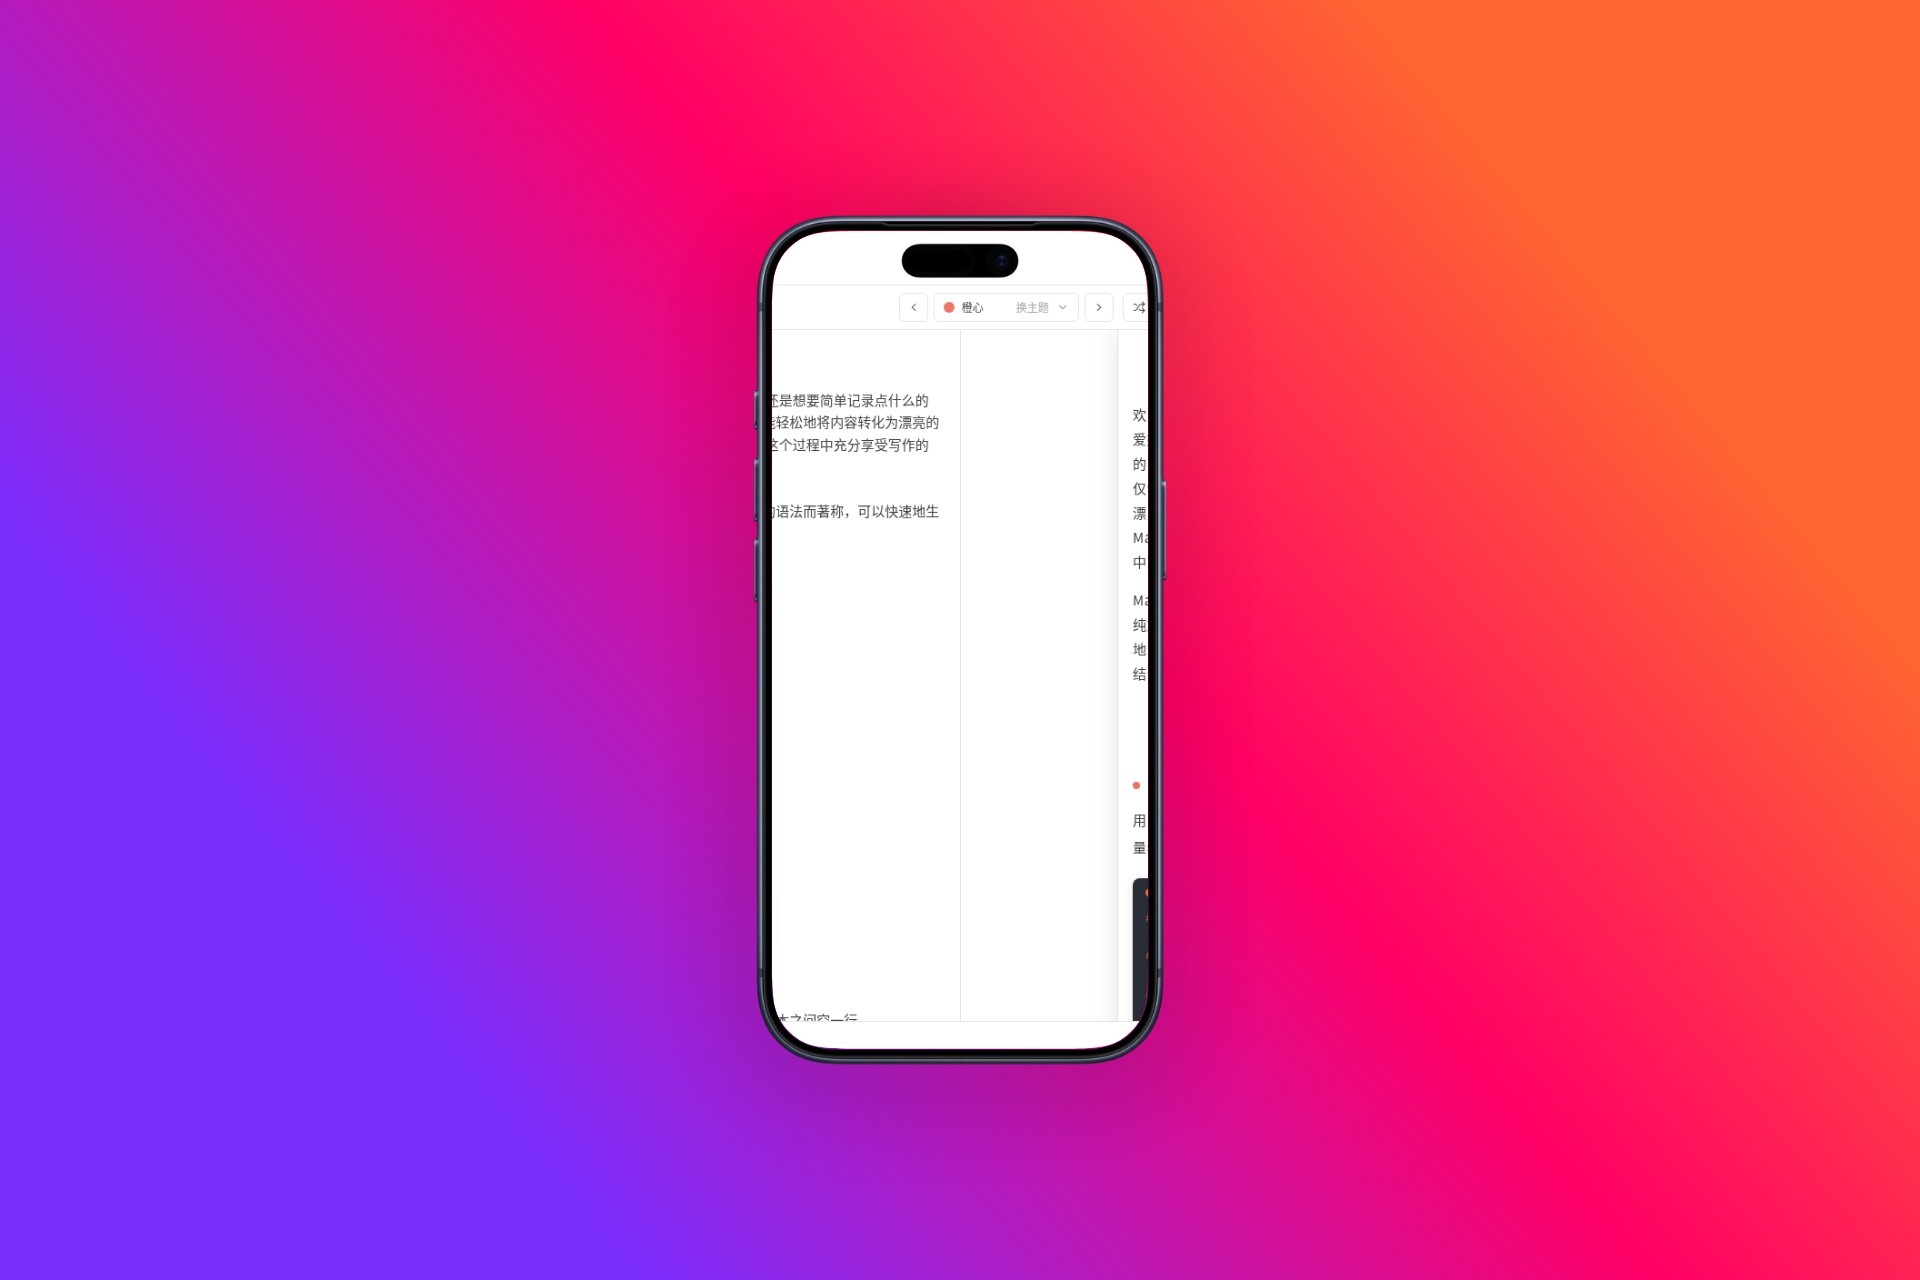
Export stayed on the defaults: PNG, FHD 1x, with the output resolution shown as 1920 × 1280. After Download we had a 1920×1280 PNG of about 1.9 MB (1,994,240 bytes). Opened in a local viewer, the frame was an iPhone 17 Pro, the background was the original pink-to-orange gradient, and there was no Puff.ee logo or other watermark. We did not try JPEG or WebP, multipliers above 4K, or Copy to clipboard.
Common failures and limits
- If the screenshot’s aspect ratio does not match the device screen, you will get cropping or black bars. Crop to the target resolution before import; it is cleaner than stretching afterward. The export above is the counter-example.
- Clicking Media did not open a system file picker in this test. If you hit the same thing, copy the image and paste it on the canvas.
- A very high export multiplier can make the browser tab stutter. Confirm the composition at 1x, then raise the multiplier if you need a large file.
- This is not a general “render any product in any scene” tool. To place a device on a café table, in a hand, or on a street, or to use a model the page does not offer, you still need a traditional mockup or a 3D scene.
- The top bar includes Sponsored, which opens a voluntary tip page, not a paywall. Free to use does not mean the promotional placements will never change.
- “Processed locally, not uploaded” is the site’s current claim, repeated on the tip page. We did not use the Network panel to inspect requests during import or export, and we did not try an export offline. If you are handling an unpublished product UI, look at Network yourself, or disconnect after the page has loaded and then drop the image in. If it is truly local, export should still work offline; if it fails, do not put a sensitive screenshot in there.
How it sits next to other options
If what you need is a fixed set of sizes for a logo, a favicon, or social and store avatars — not a UI dropped into a phone frame — this site has a guide to exporting a full set of logo sizes (EN pending). That is a delivery checklist and a sizing problem, not a device mockup. If you want to lay out a poster in the browser and then generate the image, see MossImage Studio (EN pending): it is more about generation and layout, and it usually does not emphasize nesting a screenshot in a real device bezel. To cut a photo into transparent stickers, that is a job for something like StickerSplit, which deals with people and outlines, not device models.
If you already use Figma or Photoshop and have licensed mockup files, those tools are often more controllable, especially when you need a consistent brand scene and repeated tweaks. Puff.ee is a better fit for “this one screenshot, with a device frame that is good enough.”
Bottom line
If your problem is “I need this app screenshot in a phone or laptop frame, I do not want to hunt for a PSD for a single image, and I do not want to upload an unpublished UI to a site I do not know,” start at Puff.ee. Use a non-sensitive screenshot, pick a device, export a PNG, and inspect it in a local viewer. In this test, paste import worked, and we exported a 1920×1280 iPhone 17 Pro mockup with no watermark. A widescreen screenshot forced into a phone will be cropped, so prepare the asset to the device’s ratio first. We did not verify with the Network panel whether the image leaves the browser; check that yourself before you handle a sensitive interface.


